How to Configure Kentico MVC Sites for Azure Blob Storage with Media Libraries
Updated on 3/5/2020
I tweaked the code sample to make sure to only map the media directly using the ~/ was too agressive.
Introduction
In this How To guide, I will show you how to connect your Kentico MVC site to leverage Azure Blob storage for hosting and providing media library files. This process is not exactly new, it has been around since Kentico 8.0 or so, however, with the new focus on MVC development methodology, it is not exactly as straight forward as the Kentico documentation mentions. Don't get me wrong, each small part of the Kentico documentation is 100% correct, but there is no great 100% holistic walkthrough for MVC based sites.
Plus, the trend of hosting Kentico sites on Azure PaaS via Azure App Services is very much increasing. I would say at this point it is the most common way that we deploy Kentico sites at BizStream (sorry AWS and Rackspace lovers). The only down side of hosting on an Azure App Service is that each App Service filesystem is limited to 50 GB in total size. That's where Azure Blob storage comes to the rescue. You can offload your media libraries to get those site images, pdfs, and other downloads to a storage mechanism that does not have this size constraint. After all, the largest benefit of utilizing the Microsoft Azure cloud for hosting your Kentico MVC site really boils down to added performance and scalability that the cloud gives you.
Keep reading to see the whole process step by step of how to connect an external storage provider for Azure Blog storage on your Kentico MVC site.
The Setup
I am going to assume you are familiar with both Kentico MVC and Azure Storage accounts for the remainder of this post. If you are not up to speed with these concepts, I would check out the following blog posts first:
- Hosting Kentico MVC Applications in Azure
- Kentico EMS Technology Future
- How MVC Development with Kentico 12 Will Help Your Business
But enough on the background of all of this. Let's get into some actual work. Follow along through the steps below to make all this work.
Create Your Azure Blob Storage Account
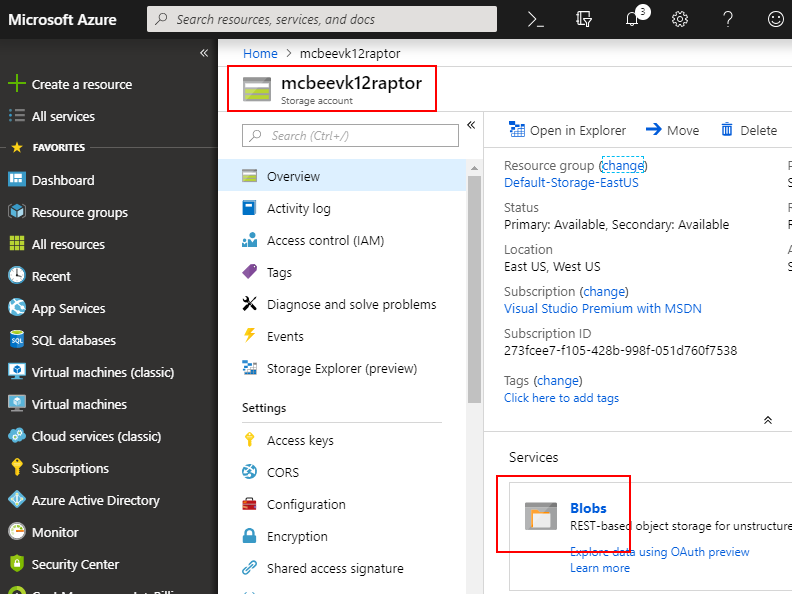
There is nothing all that special to this step. Log into your Azure account, define a new Storage account resource and note the name for later use. Don't forget that you are going to want one blob storage container per environment, you don't want to mix them, trust me. You can stay with one Storage account however.
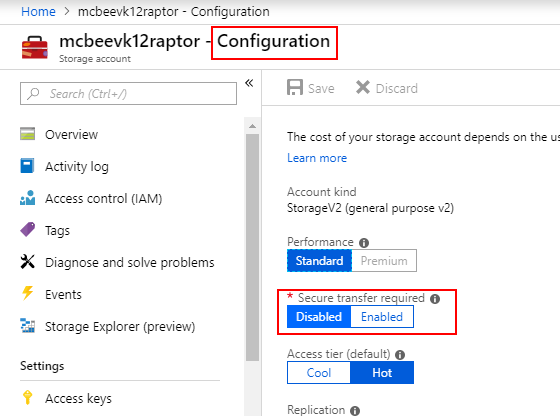
Make sure to mark that blob container to a disable secure transfer required.
Update your Kentico Site Settings
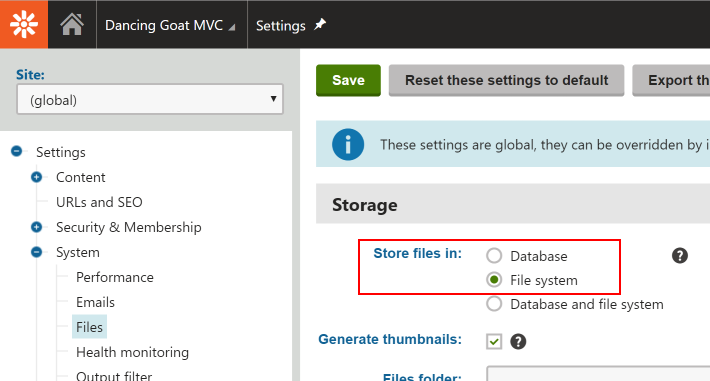
This is a bit of a tangent, and not 100% required for the media library configuration. But I am going to take it as a time to remind people that it is best to tell Kentico how to store the other files as well. Out of the box, Kentico attempts to to store files in the Database. However, the best practice is to really store files in the Filesystem. You might as well double check that global setting now, update it to store in filesystem if it is not there. To be clear, this setting has no effect on Media Libraries, but do it anyway.
On To the Required Code
Unfortunately, we can't do everything with just a point, click, and save button(s). There is some real coding that we need in place to achieve the end result we want. Follow these steps.
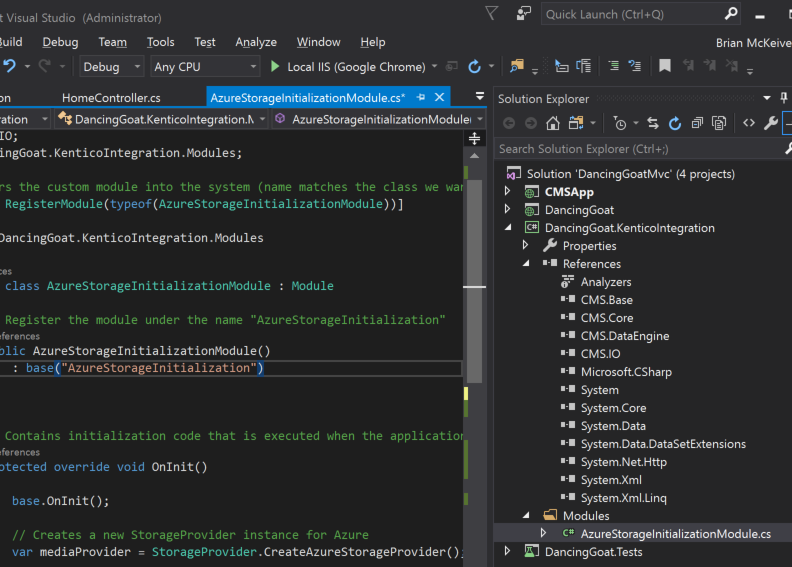
1. Create a new class library in the same Visual Studio solution as your Kentico installation. For the purposes of this tutorial, I am using the public preview build of Kentico EMS 12.0. Since I am using that preview, it has a quick installer for a DancingGoat MVC starter site, which makes this nice to setup. I am going to follow the Kentico naming convention in the starter site, and call my new class library DancingGoat.KenticoIntegration. Here is a huge tip, make sure to MATCH the .Net Framework level of your projects. You don't want to mix framework versions up. After I created the library, I made a Modules folder and added a custom class into it. I figure that more custom modules can always be added later and now I have a nice place for them all.
2. Copy the sample code from the Kentico documentation, or here in my blog post into that new custom class:
using CMS;
using CMS.DataEngine;
using CMS.IO;
using DancingGoat.KenticoIntegration.Modules;

// Registers the custom module into the system (name matches the class we want to init)
[assembly: RegisterModule(typeof(AzureStorageInitializationModule))]

namespace DancingGoat.KenticoIntegration.Modules
{
    public class AzureStorageInitializationModule : Module
    {
        // Register the module under the name "AzureStorageInitialization"
        public AzureStorageInitializationModule()
            : base("AzureStorageInitialization")
        {
        }

        // Contains initialization code that is executed when the application starts
        protected override void OnInit()
        {
            base.OnInit();

            // Creates a new StorageProvider instance for Azure
            var mediaProvider = StorageProvider.CreateAzureStorageProvider();

            //Specifies the target container name in Azure Storage
            mediaProvider.CustomRootPath = "cms";

            // Makes the container publicly accessible
            mediaProvider.PublicExternalFolderObject = true;

            // Maps a directory to the provider
            // Full path of this code CustomRootPath and MapStoragePath == "/dancinggoatmvc/media/"
            // For multisite installations loop through all of the Sites and make a call to MapStoragePath for each site
            StorageHelper.MapStoragePath("/<sitename>/media", mediaProvider);
        }
    }
}
3. Update the new DancingGoat.KenticoIntegration project references to include CMS.Base, CMS.Core, CMS.DataEngine, and CMS.IO. I would add the references from the ~/Lib directory of your Kentico installation.
4. Add the DancingGoat.KenticoIntegration as a project dependency (right click the other two -> Build Dependencies -> Project Dependencies) to your CMSApp project and your MVC Live Site project.
5. Add a Reference to DancingGoat.KenticoIntegration from the CMSApp project.
6. Add a Reference to DancingGoat.KenticoIntegration from the MVC Live Site project (in my case the DancingGoat project).
7. Edit both the DancingGoat.KenticoIntegration project AND the MVC Live Site project's ~/Properties/AssemblyInfo.cs file and make the assembly discoverable by the Kentico API / Nuget packages that are part of the MVC Live site startup scan, by adding the following:
using CMS;

[assembly: AssemblyDiscoverable]
This changes 2 files in total. Your solution explorer should now look like:
8. Now that the code is added for the External Storage Provider and mapping, we need some appSettings keys in the root web.config to tell the code where to go in Azure. This step is crucial to have correct in BOTH the CMSApp and MVC Live Site projects. I recommend that you start first with the CMSApp project. Add the bottom two keys from the above referenced Kentico documentation or my blog post here:
<appSettings>
    <... normal app settings  .../>
    <add key="CMSApplicationGuid" value="dbca4028-33d8-4aca-90d8-be890b2cd0da"/>
    <add key="CMSApplicationName" value="Default Web Site/Kentico12_2"/>

    <add key="CMSHashStringSalt" value="aea369c2-583f-4a61-9572-ad3e6e4602a2"/>


    <add key="CMSAzureAccountName" value="" />
    <add key="CMSAzureSharedKey" value="" />
appSettings>
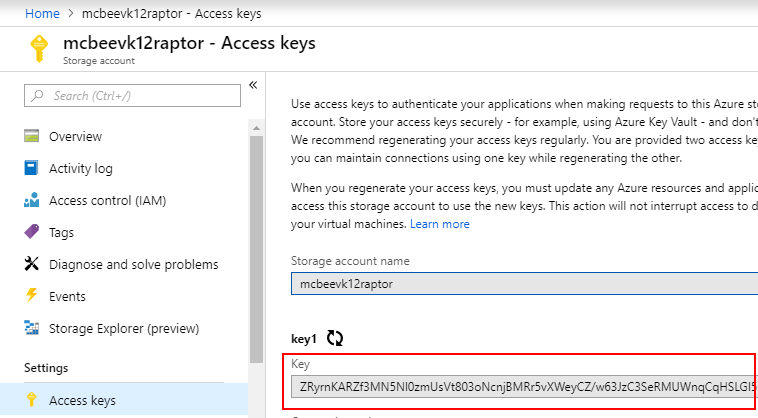
You will need to grab the actual values from your storage account in the Azure Portal. The CMSAzureAccountName is simply the target blob container name. In my case the value ended up being cms (I wanted to keep the path as short as possible). For the CMSAzureSharedKey Grab one of the keys from the Access Key screen in the Settings category of the Azure Storage account menu. It's the big key1 or key2 that ends in a double ==. It doesn't matter which you use.
Remember, you may want to add the last two appSettings into web.config transformations to support a multiple development environment as well.
Pro Tip: Do not, under any circumstance, include the CMSExternalStorageName appSetting. Just pretend it doesn't exist. I know you might be tempted because it has the word Azure in the value, but you do not need it.
9. Now Rebuild the solution and check for build errors, should be none. If there are no errors, repeat the above step in your MVC Live Site project. Yes, both root web.config files require the custom module code and the appSettings keys. Basically, on the MVC side we still need to tell the Kentico nuget packages that we are redirecting media library storage to Azure. If you don't do this the MVC Live Site will still look at the normal filesystem for the files and you will be stuck looking at a 404 error for all your images for hours...trust me I was not happy about this.
10. Go ahead and run / debug the CMSApp project now.
The Results
If everything works, you should see an entry in the Event Log that is part of App_Startup where the list of modules is initialized on Kentico's first request. Your name of your module should be loaded into the runtime and included in the list of that log entry (same name that you have in base:"modulename" part of your custom class).
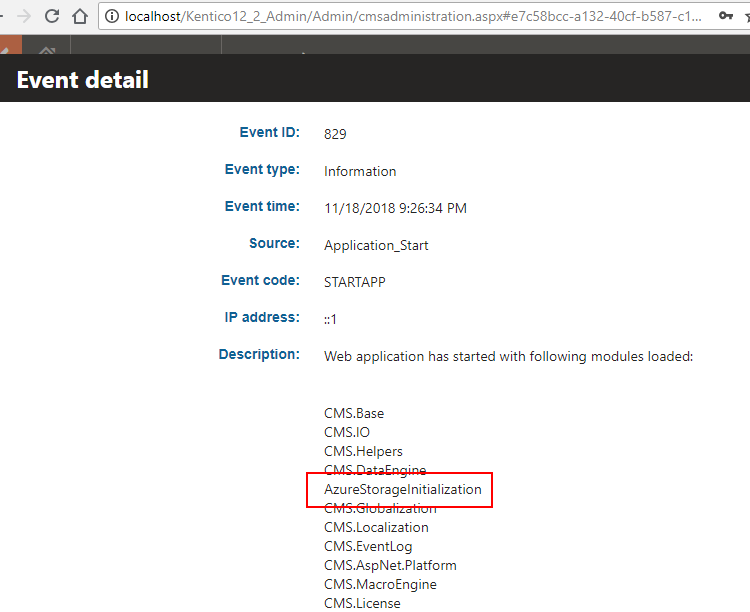
If you don't see this, something is wrong, go back and add a break point ot the custom class's base.OnInit() call to make sure you see the app run through that function.
Now it is time to try it out for real. Navigate over to the Media Library application and create a new Media Library, I named mine "Azure Media".
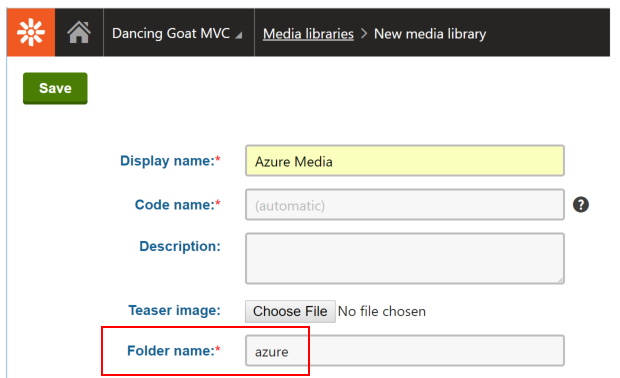
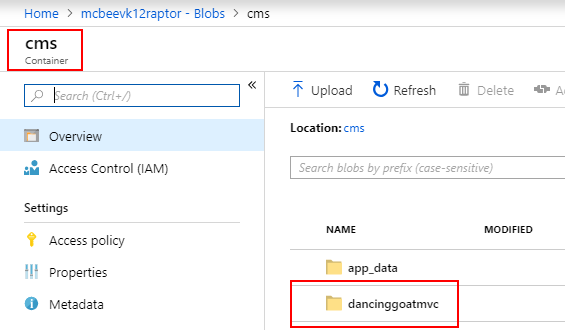
What this does is forces the external storage provider to create a folder through CMS.IO into the blob container. When you do that you can navigate back to the Azure Portal and view the blobs in the container and see that there should be a few folders in there now with your site code name and app_data being represented.
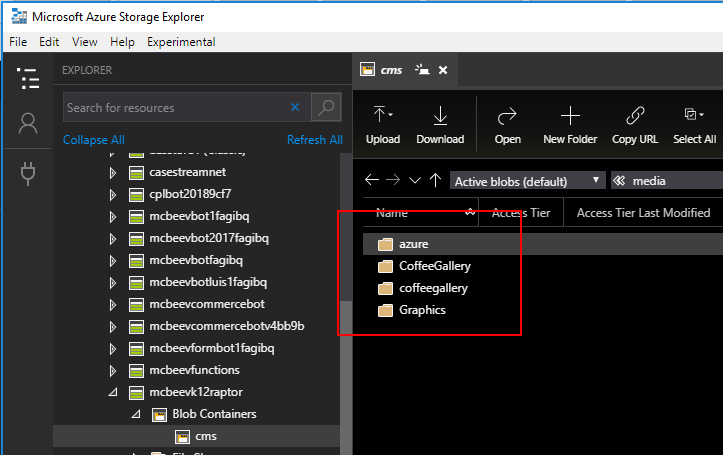
Now that you know a little about this, I highly recommend you start using the fabulous Azure Storage Explorer tool from Microsoft to really start looking at the blobs in Azure Storage. It's way better than looking through the Azure Portal. Go download it, login, and then navigate back to the cms container to see this:
Next go ahead and upload a file into the new media library folder. I uploaded the Kentico logo file. Once the file gets up there you should see the file's Direct path referencing the Azure Storage external endpoint: (https://mcbeevk12raptor.blob.core.windows.net/cms/dancinggoatmvc/media/azure/kentico_rgb_bigger.png)
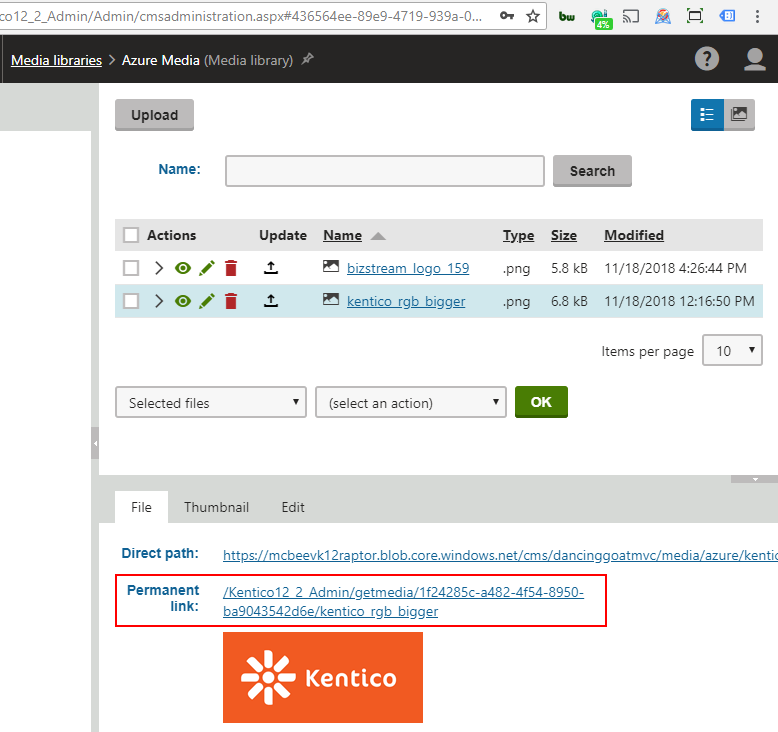
Now this means half the battle is working. The Kentico 12 admin tool is correctly pushing new file uploads to the blob container. Next we need to go test out the GetMedia handler (permanent URL) on the MVC Live site. Copy the Permanent link from the admin tool and open up a new window to your presentation URL of your MVC Live Site. Paste in the relative ~/getmedia// link into the end of that presentation URL and remove any reference to the admin tool in the URL path and you should see the image show up at URL of something like http://localhost/Kentico12_2_DancingGoatMvc/getmedia/16b40b07-9b41-4812-9194-4bb35470ad8c/myimage.png.
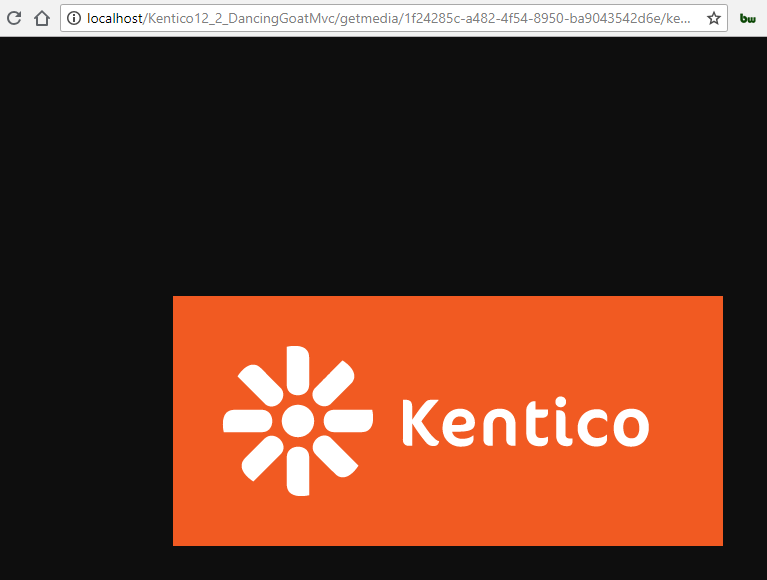
Pro Tip: Add in a random querystring value like ?sd=sd to the end of the querystring to make sure you get the latest version of the image, and not one from your client browser cache. Sometimes browser cache is not your friend.
A Note About Migration
You can migrate existing files to the blog storage container if they existed locally before. You can simply copy the files from your local Media Library filesystem on your local machine or server to the blob container by copying and pasting in the Azure Storage Explorer. However, all of the folders and files in the entire media library need to be Lower Case! This is a pain, but a requirement of Azure. That might be a ton of manually renaming files, or time for a handy powershell script. That is why I recommend you configure Kentico this way at the beginning of the development cycle, before any real content is entered. This technique does not effect existing files that were already present in the Media Library.
Conclusion
There you have it. Your Kentico 12.0 EMS Admin tool and Kentico 12.0 MVC Live Site is now connected to Azure Blob Storage for hosting and providing your site's media library files. Enjoy the speed and scalability benefits that Kentico gives almost out of the box with Azure. Until next time!


